


Marcille's Staff from Dungeon Meshi Build/Tutorial
- Mar 5, 2024
- 9 min read
This is the first prop I built like this I've made since 2018-ish. I stopped cosplaying for a while due to multiple reasons but for the past few months I've been rewatching anime and resparking my love for making things. Something about Dungeon Meshi just really hit that for me. Marcille's design also just spoke out and made me want to make it.
I loved making her staff and wanted to share the process I went through to make it. Hopefully I can help out anyone that also wants to make Marciell's staff or something similar.
I unfortunately only started taking pictures once I was adding on the foam so I'll do my best to describe the process and if you have any questions feel free to reach out to me on Instagram or Tumblr.


Materials and Tools:
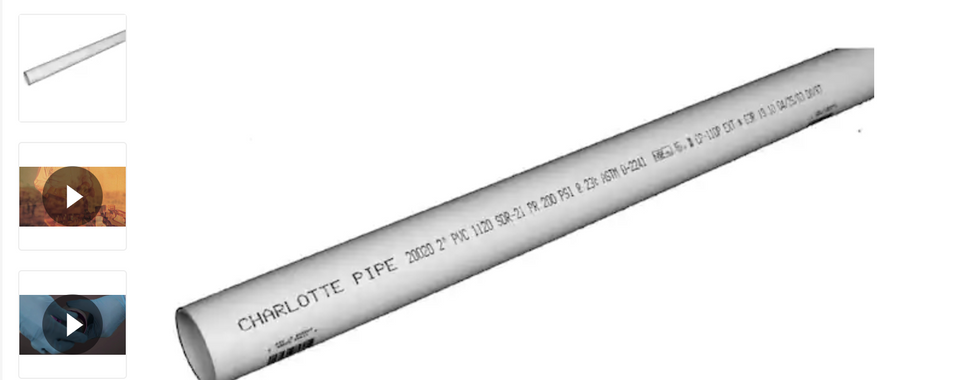
PVC Pipe (I used 1 inch wide but that's what I already had and what felt good in my hand)
Air Dry Foam Clay (about 500g)
Black + Purple + brown (or a mix of blue, yellow, orange and red) + Green Acrylic Paint
needle nose pliers/ pen
Water
Paper towels


Base:
To put the base together was pretty straightforward. I used the reference Image to see just about how tall I wanted the whole thing to be. The height of her staff is from the top of her head to around her ankles.
For me that's about 57 inches. I got the 12 inch Styrofoam ring so that left 44 inches to cut in the PVC pipe.

Note: If you use any other size of ring or if your shorter/taller than me (5'5) you would just measure out the height from your ankles to the up of your head, subtract the length of the top of the ring to the bottom of the inner circle, then subtract another 1/2 to 1 inch on top of that to account for the extra foam and end cap that's going to be added. (If you're ever in doubt add a couple extra inches then as you're putting the base together remove what you don't end up needing before gluing)
Once you have your pipe cut you can attach the ring to the pipe. The pipe cutter I have comes with a deburring tool so I was able to deburr the end of the pipe to make it sharp enough to just shove it into the ring to make a hole. But I know not everyone has that so what you can do instead is press the pipe against the circle to make a indent of the size you need and use your exacto knife or box cutter to shave down the inside so you can insert the pipe through the whole width of the ring.
At this point you can use hot glue to glue the pipe into the ring and the PVC cap at the bottom of the staff.
Note: You don't necessarily need to add the cap at the bottom it's mostly to have a good rounded bottom to the staff instead of having the hole. If you wanted to you can just add a bit of extra air dry foam on the bottom instead.
Note: You can use other glues for the Styrofoam like UHU Styrofoam glue and Weldbond as well as using PVC glue for the cap if you want but be careful since some glues will melt the styrofoam and others will also have some pretty toxic fumes. So if this is your method of choice remember to use a respirator and work outdoors or in a well ventilated open space. But If you're like me and doing everything indoors, hot glue is good and pretty solid once everything is put together.
Base Foam:
For the ring I cut out 2 1/4(two and one fourth) inch strips from 2 foam sheets and hot glued the ends together to make just one long roll.
Note: You don't really need to do it this way but it makes it easier for me to connect it together from the start instead of trying to line up the ends once I'm gluing it down.
Make a diagonal cut at the end I started from the bottom and slowly started to wrap the foam around the ring overlapping just a bit of foam as I went.
Note: I went slowly and in 2 to 4 inch sections since the hot glue will warm up the foam enough for it to be moldable so you wont have to worry about it bunching up and looking weird.
After wrapping the foam around the circle I cross-crossed the overlapping pieces at the top of the staff. This is where I’ll be adding a rope detail later on so the little bump that’s is created will not seen.
After that I cut out 3/4 inch strips of foam and glued the ends of them together again to make two more rolls. Now going over the little bump the overlap made from the first pass through. I went over it twice to get a good sized spiral around the ring.

Adding The Air Dry Foam + Details:
I started off with adding air dry foam to the rod of the staff and did it in three separate pieces. I grabbed a little bit less than a fist size of the foam and used the rolling tool to flattened it to about 1/2cm or 1/4in thickness and wrapped it around the staff and used the flat thin tool to add some diagonal lines in various lengths and widths going the same way as I was moving up the staff.
Note: The tools aren't particularly important you can honestly use any cylinder shaped thing to roll it out and even a plastic knife as the flat tool. And the groves don't need to be uniform. It's better if it isn't uniform so it looks more organic.
Just like for the pipe I grabbed that little less than a fist sized ball of the air dry clay, Rolled it out and added the groves with the flat tool. I also did this in multiple chucks, doing around 1/4th of the ring at a time.


Once the foam was all laid out, sculpted and dried I used a pair of needle nose pliers to make 5 small holes I could stick a small wooden dowel into. I made sure it was pushed in through most of the ring and cut off the end leaving about an inch left sticking out.
Note: You don't need needle nose pliers, just something small and sturdy enough to get through the foam.
I grabbed a little bit of clay, made a cone shape and stuck it onto the dowels. Then I just started to turn the clay so it could make the shape of the little twigs sticking out. twisting it already made groves but I also went in with my flat tool just to add a little more. At the end I also just used the pieces of dowel I cut off to support the tips so they didn't droop while drying.
Note: The amount of twigs is up to you. Throughout the show and manga the number of twigs changes so if you want more go ahead and make as many as you want. For the most part though it’s seen with 2-4. I went with 4 just because I liked the even number.
For the leaf on top I wrapped the foam around the tip of the dowel. Then flattened out some and used my flat tool to cut out a leaf shape then rolled the sides again just to make them a bit thinner, attached them to the foam on the dowel and again used the flat tool to make some leaf veins. I also used some of the excess to make a couple of extra baby leaves to the top.
For the rope accents I started with the ones going over the ring. Rolling out a long tube of the foam then cutting it in half then twisting the two halves together. I then laid it over the ring and used the flat tool to cut off the ends right where the bottom of the ring meets the pipe. I laid those out four times. Then I did the same again just making the tubes a bit bigger and going over the top of the staff making sure to lay over the ends of the foam I just cut off so it all looks connected.

Priming and Base Paint:
The first step to painting is to prime it. If you don't prime it then the foam will end up just absorbing the paint.
I started off with two coats of Modge Podge to seal the entire staff.
Note: I used Modge Podge but another popular way you can prime foam is by using Plasti Dip. It is a bit faster since it is a spray, you wont really have to worry about cracks when flexing foam, and you wont have to worry about the texture that comes with paint brushes. Though the trade off is just like the alternative glue, you would need to use a respirator and work in a large open space/outside. Along with that Plasti Dip is it tends to clump up in lower temperatures. A way to work around the cold is placing the can in warm water before spraying. It also tends to be more expensive than Modge Podge.
To get the wood colored paint I used a mixture of Red, Blue, Yellow, and Orange color shifting Metallic Acrylic paint. I used these paints for a couple of different reasons. I didn't have any brown so I had to mix my own. If you need a visual to see how to get different shades of brown This Graphic is pretty helpful. I wanted a bit more of a light warm brown so I used more yellow and orange in my mixture.

I also specifically used the metallic paint because 1. It's what I had on hand 2. I just really like the look of the metallic finish 3. It makes highlights so I won't need to go back over to highlight during weathering.
For the leaf I didn't need to adjust it too much just adding a couple of drops of back just to get it slightly darker.
I also added some of the matte Modge Podge once I was done mixing the color so the shine from the metallic wouldn't be so intense. Adding it in makes it so I won't really have to worry about going back over with another layer of Modge Podge in order to seal everything up. You'll want to add the Modge Podge in a 2 to 1 scale. 2 parts paint and 1 part Modge Podge
Note: I also specifically added the Modge Podge after I already had the color I wanted because Matte Modge Podge is white and dries clear. So if you're trying to get the color while it's ready in there once it dries it'll be darker than what you mixed.
It took 3-4 layers to get the whole staff properly covered so I wouldn't see any of the black foam underneath.

Weathering:
If you don't want to, you don't necessarily need to do this step. The staff can be done at this point but I like the look of weathering. It makes things look a bit more realistic and brings definition to the details of all the groves that we took time to make.
To make the weathering mix I used matte Black and white acrylic, Purple color shift acrylic, some water, and Modge Podge.
Note: I don't like using straight black to weather. It tends to look more cartoonish. Think more like Borderlands or JoJo Bazaar Adventure cosplays where the lines are more defined to mimic the hard lines used in the games/comics.
You'll want to use mostly back with a drop or two of white and enough of the color shift purple to give it just a bit of shine like the base color of the staff.
Once you have the color you want you can add the Modge Podge and water. You'll want to do the 2 to 1 scale again for the Modge Podge. While adding the water you'll want to do more of a 1 to 1 scale. Aiming for the consistency of like a thick soup.
To paint you'll want to saturate an area of the staff with the paint using the brush to tap it into the groves. I like to let it sit for about 10-30 seconds to before using a paper towel and wiping away the excess. If you want more weathering, I would recommend going over the area with multiple passes until you're happy with the look. I didn't really need to go over anything more than twice.
If you want a visual of what that looks like I made a speed build video where I recorded my weathering process you can reference. The weathering starts at the 6:40 min mark.
For the rope and spots around it where there are deeper groves I would use a smaller brush to get in the areas and just let the paint stay in it and dry.
Since we used the Color Shift Metallic paint we won't need to go back over to add highlights since the light will automatically shine off it and create the highlights at any angle.
Note: If you weren't using metallic paint up to this point I would for the weathering and want to add highlights, I would use a light color metallic acrylic (I used purple)and make the same thinned mixture as you did for the black weathering then go over it once or twice more to give the highlight effect.

And just like that you're all done!
Or if you make this staff yourself or something similar using my tutorial send a picture my way, I love seeing things that people make and knowing I could help someone out with their cosplays!
Comments